WARNING!!
All content on this website is copyrighted. Do not use any content of this website without our written permission, to include photos.


Wednesday, October 26, 2016

I know why they call it Fall...

Because you have so much work to do before winter brings its icy chill that you work yourself neigh on to falling over every day! 

The past four weeks have been a blur of activity thanks to some seriously FABULOUS weather.  September into October can either be stunning (which it has been), or go to Hell in a Handbasket (which it hasn't).  The days have been getting alarmingly short rather quickly, but the daylight we have had has brought us light breezes, dry air, and temperatures in the 70s.  I couldn't possibly pass up that combination to work outside and built the addition to the chicken run.

One fine October morning I just started working on it.  Plain and simple, out of the house and started digging holes and sizing up walls.  I can't tell you how nice it is to have the supply of lumber and concrete and all those other building necessities just sitting in the barn, waiting to be used.  Before we settled down, every time we had a project, we had to buy all the materials for that project.  We didn't have room to store things.  I'm not saying I didn't make my normal million trips to the hardware store or lumber yard, but having the basics just around made things a little easier.

I no sooner walked down the hill with my can of marking spray paint and a 2x4x10 and every fiber of my body instantly remembered how hard construction was.  The falling into bed exhausted from a day of construction in the elements, keeping house, volunteer work, and herding a teenager.

I had an idea of what I wanted.  Basically it was a lean-to addition to the main run.  The birds needed more space, more shade, and a wind block.  Even on a sultry summer day, the howling winds would send them, feathers blown asunder, to seek shelter either under or in the coop.  The lean-to design would allow them another 100 square feet, would have windows that would open and close, a real roof, and solid walls.  With the windows open, wind would flow freely.  With the windows shut, air could exchange through the main run and, by extension, the addition without blowing all the feathers off the birds.

I wanted to continue to use the tipping wing on the east side of the old run to provide winter shelter and a rain shield, so the height on the run was determined by the closed position of the wing.  The height of east most end of the new run was determined by how far I was willing to stoop to work in the new run combined with the necessity of making the new roof have a functional slope.  I also wanted to be able to make the most of dimensional lumber whenever possible, with as little waste as possible.  What I ended up with was a high end of just over 4 feet, a low end of just under 4 feet, a run of 8 feet and a roof slope of 7 degrees.

It sounds all so meticulously planned.  It wasn't.  I had the whole thing on a napkin and in my head.  I just had to rally my body to get with the program.  For such a small project, and an easy plan, it was made ridiculously complicated by the speed at which it had to go up.  Sure, I was facing an ever collapsing window of amazing weather, but the real trick in timing was the order things HAD to be done in for the security of the chickens. Besides the normal order of things, Job A then B...  I couldn't take part "C" before "B", and couldn't install windows before cutting out the hardware cloth wall between the new and old sections or I'd be trapped in the new addition.  I couldn't install the windows without the sashes.  I needed the hardware cloth from the old walls to use on the interior of the windows.  Everything had to be ready and in place for the day I would cut that wall down.  Once the security wall came down, there was no going to bed until the addition was a fully secured Ft.Knox as well.

See how that would add stress?

That said, should we start?

The location was locked in, so I just needed to finesse the size.  8 foot wide would allow me to use 8 foot lumber.  Handily enough, I can get 8 foot lumber in my truck.  10 foot boards, I can only fit 4 as they have to sit up on the dash.  12 footers, well, those have to ride diagonally out the passenger window.  So I do prefer to keep the world to 8 feet when I can.  As for Plywood.  Sigh.  4 foot wide pieces will NOT fit in my truck.  It drives me BONKERS.  So while I was digging post holes, I was pondering what to do about the walls and roof.  But I digress.

First things first, the post holes.  I literally placed a scrap 2x4x10 on the ground marked at 8 feet, lining it up with the existing run wall and sprayed where I wanted the post to go.  I did the same for the other end and used a scrap 12 foot piece to make sure they lined up with each other.  I dug out the
 holes, with lots of help from our overly friendly construction overseers group, and tossed in 4x4 treated posts.  These were leftover from another project.  I sunk them about 20- inches deep and set them in concrete.  When they were fully dry a few days later I cut them to the length I wanted.


I painted a 2x6 to the coop run to add as a header and support for the roof on the run side of the addition.


I temporarily screwed a 10 foot piece of 1x2 to the old run and ran it out to the post to determine the slope of the roof.  From there, I was able to attach my 12 foot header from post to post and make it level, cut and attach the 2x4 end roof supports on both ends and trim the 4x4 posts.  Treated and painted 2x4s were laid on the ground and a 2 foot wide piece of hardware cloth was attached to the wood.  It was then tacked down with landscaping staples.  The hardware cloth will simply vanish as the grass grows up through it.

The windows are all salvaged from the local Habitat for Humanity Re-Store.  They all needed a good scrape down, sanding and filling, and several coats of white paint.

Here's were it got tricky again.  I needed the windows to be flush mounted with the walls.  The opening had to be smaller than the windows, so that when closed, rain wouldn't find its way in.  My east end windows seemed HUGE! I didn't remember them being so big and swore I had purchased similar, but smaller windows.  After tearing the barn apart, and not finding them, I figured I had just remembered incorrectly and pressed on with fitting the addition to the new windows.


To make the opening for the windows, I measured the interior dimension of the windows.  This is where the 2x4 stud in the wall would be, and where the siding of the wall would be.  I centered my openings and put up the studs.  Once the siding was on, I would make frames to overset the windows and hinges.  The north end window is simply a permanently closed picture window, but the framing was the same.  The window on the south end is a flush mount window, so the studs needed to be right up  to the edge of that window.  Once the studs for the window were in place, it was time for the roof.

Since it was almost, but not quite flat, I decided to treat it as a deck and framed it as such.  The rafters are every two feet on center and there are plenty of cross supports. As for the plywood.  I decided to have them cut it into 2-3x4 foot pieces and 1-2x4 foot piece.  All of which fits easily into my truck.  I decided I wanted a slight overhang on the ends, so 12 feet of plywood left me short, so a scrap piece of 1x10 from the barn allowed me a little wiggle room.  The small difference in thickness is lost once the shingles went on.  The shingles were also from HfH and only cost me 3$ a bundle instead of $40 a bundle.

While this roof didn't need a second hand to put on, it sure did help and was appreciated.  Doc and I managed it in 4 hours with him cutting and me nailing.  I am sure at this point the neighbors thought I was nuts again.  Here was this big roofed monstrosity, attached to a giant BLUE monstrosity, and this one was WHITE!  What must they have thought?!  I know I must  provide great entertainment :)

I took a one day break at this point.  So far (not including concrete dry time) I was up to 4 days.  Saying I was sore was an understatement.  I decided to clean the garage from its summer of making piles and dripping mud.  This is when I found the two windows I KNEW I had purchased earlier.  They were smaller, but the window openings were framed and I was NOT going back!  While I cleaned I pondered the additions walls.  I COULD use plywood, like I had on the main coop.  Placing large pieces up on the walls, tracing the openings and then cutting them out, but I wasn't sure I was up for figuring out the piecing since I had areas that were over 4 foot and many openings.  It just seemed a waste of time and energy.  I decided on board and batten.

The number of 1x10s I needed were about the same cost as the same sq footage of plywood, and was thicker and of better quality.  I could certainly get it into my truck a lot easier.  I could also cut it to the exact length I needed on the chop saw (note to self, the chop saw only cuts to 8 inches- nothing a quick flip and second cut cannot fix.)

Once the walls were up, it started to feel like I could see the light at the end of the tunnel.  Sadly it was just an oncoming train.  There was no going in for the day when the last board went up.  I had to get at least two coats of paint on it before the rain came the next morning.

Two glorious days of clouds and gentle rain forced me to think about the next step; the elephant in the room step.  The addition had a roof and walls, and window openings, but no safety wires IN the windows.  Once I snipped the wire walls between the two halves, it would have to be a full steam ahead day.  NO stopping until the unit was secure again.  I stood in the old run with the wire cutters in my hand, chickens at my feet.  As soon as they figured out wire cutters aren't for them, they left me and my deep thoughts for the grasshopper infested pasture.  This was it, no going back.

snip, crack....the bolt cutter made short work of the first panel of the wall.

I had the header board ready and prepainted.  This board sandwiched the remaining top of the hardware cloth by the wing to the header board on the addition.  I also had the smaller 1x3 boards that were to cover the raw cut edges of the new opening between the runs.  I did one opening at a time, so I could protect the birds from those sharp edges of the demon wire.  You really have to watch this stuff.  It's amazingly sharp.  At one point I pushed the wire into the new addition, out of my way to make cutting easier.  JUST as I thought to myself, "watch out that it doesn't kick back and smack you", it did.  Right across the end of my nose.  Mercy it bled and bled and bled!  Two wires punctured and scraped.  I looked like I had had a fight with a snake!  Dealing with that took almost half an hour! 


With the panels between the two halves open and safe, I needed to move on to the window openings.  I used the large pieces of hardware cloth for the openings.  I had JUST enough.  The wire was attached with large nail in staples and then covered with wood trim, which further secured the wire to the structure and also covered up those raw edges.


It was now time to move on to the large windows themselves.  The North window simply screwed in place and was eventually trimmed and painted. 

The South window simply screwed into the opening and then the raw window opening was trimmed out.

The East Windows were just a tad more work.  But not much.  Remember the windows themselves are larger than the opening.  To install the windows, I measured and cut a 2x4 to the length of the top of the window, PLUS 7 inches.  I attached this header trim to the top of the window using heavy duty hinges.  I screwed this to the run so that the window was centered on the opening.  I then attached the left, right, and bottom trim - all 2x4s, leaving a gap around the window so it would not be hindered in its swing.

The original plan was to use a hook and chain to lift and hold the windows open at various degrees of open, but the windows were just too heavy.  I have found that a simply scrap of 2x4 is not only easy, but very sturdy as a prop.  I can still get many degrees of open.

I also added barrel latches to secure the windows.

The only remaining thing was to add the battens.  For those I used 6 foot lengths of lap attached with tack nails.  Three coats of paint later and the whole thing was done.

I went back in to add PVC feeders to the joists, not for feed, but for calcium and grit.  (Using them for feed has NEVER worked for us.)

I also have hung a mirror and added their mini ladder to play on. 


I also had to build them a new outdoor play roost ladder as I had to move the old one to open the walls. 

As long as I was dirty, I decided to finish off the nest box in the coop.  What started off as a 3 over 3 nest box, evolved into a two plus a basket over 6.  The basket was such a huge hit, that I removed the hard two boxes and added two more baskets.  I remembered that occasionally rain DOES come in the window above, which used to drip on to the nest box roof, which was now gone.  I rebuilt the roof and simply used pieces of 2x4 as front supports.  It's more popular than ever.

I then remembered that I had two plastic wall mount nest boxes and added those for the girls that just decide to lay al fresco on any given day.  They are a huge hit.  Even the rooster got in on it.  However this was NOT appreciated by the girls waiting in line.
Yes, HE is in there.

When the girls had pretty much denuded the grass in the addition, I added a whole bag of pine shavings.  Since I cannot stand up in the new addition, I will not be practicing deep mulch composting in this portion.  The old portion I add hard mulch and pine shavings to balance food scraps and chicken poo.  When it composts down, I can easily shovel out 10 wheel barrels of fabulous black earth!

The girls are loving their extra space and are crazy happy.  They now have 300 sq feet, which still gives me plenty of room when I let one go broody in the Spring.  It was a super project, but I am sure glad to be done!


Tuesday, September 20, 2016

It's been a long time!

I realized the other day that I haven't been through here in a while.  I can't believe that it's been almost 7 weeks!  SEVEN WEEKS!  That's insane, and I apologize.

I imagine some of you have been waiting with baited breath, huddled around your  glowing computer screens, wrapped in a tattered blanket, hair all askew, clutching a cold cup of coffee, soothing your frayed nerves by gently rocking yourself.

Well kick off your blue bunny slippers and make a fresh pot of coffee, because here comes the latest installment to the Station.

No news is good news, eh? 

Honestly, it's been a nice slow, albeit hectic, summer.  We were constantly busy but with what is all a blur.

The garden struggled all summer.  The tomatoes never did bounce back from the late replanting.  They should have, in a normal summer, taken off like wildfire with the early June planting.  The soil and nights were gloriously warm.  The problem was that the soil was ridiculously WET.  I don't mean damp, I mean SOGGY.  I was expecting to find buried bog people or bog butter when I replanted the garden after the hail storm.  Then, just as the plants got going, it stopped raining and got hot.  I can do something about the lack of precipitation, but the blazing sun?  Nope. There was nothing I could do about the searing, blazing, face melting heat that we had this summer.

Not only did I not get to can ONE tomato this summer, but I had to pick them green the first week of September.  I managed three harvest flats of green tomatoes for ripening in the basement.  We have about 20 tomatoes left total.  The grasshoppers and crawlies took more than their fair share in the garden.  The second a tomato looked like it was changing from green to orange, it was fair game for a good chomping.  I saw the hens roll their eyes at me more than once when I would throw them yet another wormy tomato.  I think they are sick of them.  Although come January, they'll miss them!

The birds [sparrows, not chickens -Doc] ate all the grapes.  That's fine.  This year was to get the vines going.  In the late winter, I'll go out and prune and train them, along with the blackberries. The onions, all of them, were only about the size of billiard balls.  Which is OK, but as they dried in the sun, on the second floor deck, the hoppers found them.  Some of them were literally eaten half away.  That's CRAZY!  So I lost all my harvested onions too.

The pepper plants just plain died.  I guess they didn't like the bog and became root bound and drowned.

The sorghum had just enough gorgeous canes for me to put aside for next year's fair.  I'll harvest the rest for winter chicken treats.

It was a bumper year for weeds and grasses.

Doc and I tore up the garden two weeks ago, and left the cherry tomato plants, which are full of tomatoes, worms, grasshoppers for the girls to play with.  We are also leaving the gate open so the free ranging pest control team has anytime access.  [Poor Juanita keeps forgetting how to get back out.  Definitely not the rocket scientist of the flock. -Doc]

Speaking of the fair.  I entered several things last minute on a whim.  Why not, right?!

Garlic Dill Pickle Hamburger Slices-1st place
Tart Applesauce - 1st place
Dill Jalapeno Pickle Relish- disqualified but AMAZINGLY delicious I was told - I used the wrong sized jar
Sweet Dessert Cherries -3rd
Candied Jalapeno Peppers (from last year's blog post)- 3rd, but also amazingly delicious.  They didn't know what category to put it in, so they put it in with "others".  It wasn't a jelly and it wasn't a pepper, and it wasn't a sweet.  LOL.  So it was up against about 100 "other" jars.  I'm happy with 3rd.

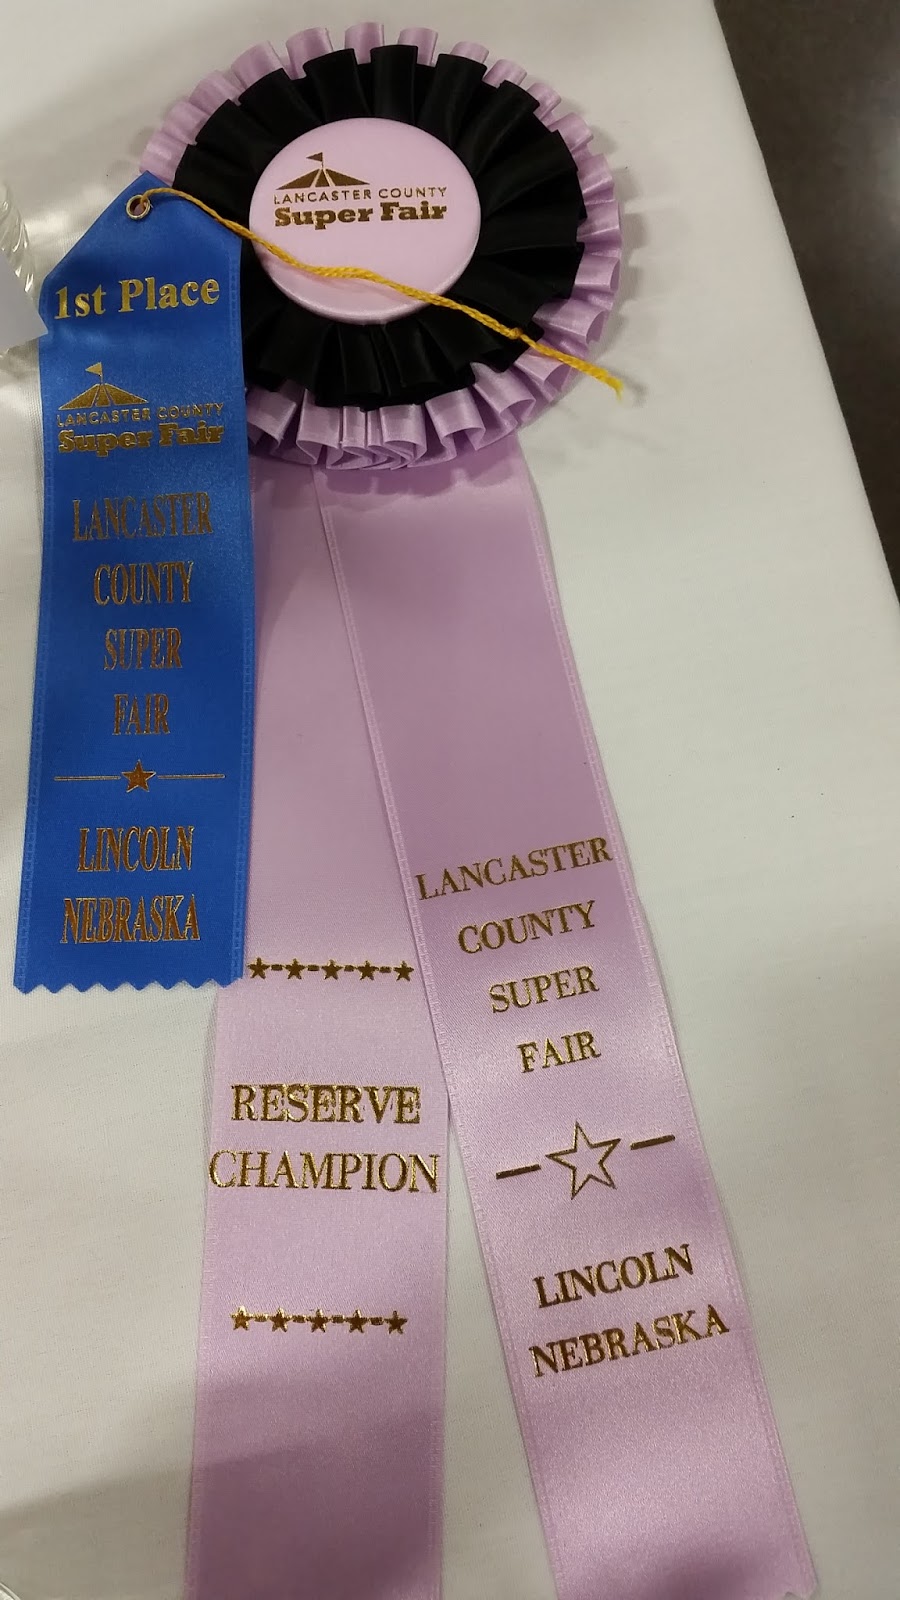
Barney the Ameraucana Rooster - 1st place and Reserve Grand Champion AND his new forever home, where I hope he is happily protecting his new hens from predators and running around making baby chickens.


The fair took up more of my time than I wished it would.  Mostly because of the rooster/cockerel.  They said food would be provided.  It turns out that their version of food is half a cup of scratch twice a day.  Ummm, that's NOT FOOD!  It was also ridiculously hot and humid every day of the fair, as it is anytime there is a fair.  The heat index in the poultry/livestock barns was near 130 degrees, even WITH the big fans running.

I made it a point to go in before work and after work to make sure he had plenty of water and ice, and to feed him real feed in the morning and fruit at night.  He was not a fan of the cage, more to the point, not a fan of the geese in the next row, nor of children poking their fingers in his cage, or of the judge.  But he was perfectly happy with me picking him up and taking him for walks (carry around) twice a day.  People sure loved to see him out and about and kids loved to pet him.

So with all that extra driving (the fairground is an hour- one way- from the house), I'm not sure critters at the fair will be happening again.  The canned goods and harvest plants, sure, I can do that.

The chickens continue to entertain and delight us.  The egg business is booming.  I have several regular customers as well as the field trial camp below us.  So with all this demand for eggs, naturally the hens have decided to molt!  Feathers EVERYWHERE!   Poor Rose, who was already looking ragged, is now tailless, and has no feathers on her breast or head.  She's quite the sight.  Proud Olive is tailless, and Blizten and Leela look like they need to join Feather Club for chickens.  Everyone else is just losing them here and there.  But OH THE FEATHERS!

We are still waiting on Bea to start laying eggs, although she is looking more and more henny penny than pullet lately.  She also has a nasty habit of nest box sleeping.  The Boy goes out each evening and pulls her out and puts her on the roost with the others.  Some day she'll get it.  Nutty bird.  She is the last of the pullets to lay.  But since no one is laying now anyway....
Ellie's first egg.  SO TINY.  The coddling cups hold one full, large egg.

The build on the chicken run expansion has begun.  It will add another 100 square feet to the run off the side.  It's a sloped cape cod looking thing.  The north side will have a window that will not open, and the other two sides will have giant tipping windows.  The sides are going to be board and batten.  It's a large, but a smaller job.  This project will take me a while as I am working on it in the evenings, when the blazing sun starts to sink behind the barn.  September's and October's sun is like being under a magnifying glass.  The air is dry by the evening, but in the morning, the dew has to burn off before it's comfortable to work outside. 


Fun chicken story of the week:

Last night, Doc and I were outside discussing the plan for the new roof on the new run when The Boy came out to feed the hens, who were all down in the pasture gorging on katydids and grasshoppers.  He stopped and pointed, "what on Earth are they doing?" 

We glanced over and sure enough.  They chickens were being weird.  Well they're always being weird, so isn't that their normal?  So I guess "LOOK, the chickens are being exceptionally NORMAL!" should have been the cry. 

Anyway, there they were, 8 chickens in the round, like a wagon train circled to protect themselves from the impending attack.  Except THEY were the attacking ones!  All razor sharp beaks were pointed to the center of this great circle.  You could hear them mumbling and clucking to each other.  A small step by one towards the center would be met with exciting chittering, and hasty retreat.  Then another would try.  Sure enough, in the center of this feathered hokey pokey was a snake.  A poor, defenseless, 30 inch, terrified, prairie garter snake.

The poor little thing was just out for his evening feast of crickets and frogs, when it found itself the invited guest at a dinner party.  Luckily enough for him, he was just too large of a target for the girls to want to tackle.  Why get up from the sofa for a steak dinner, when there is a plate full of hamburgers sitting on the next cushion over?  While the hens weren't going to eat him, they certainly wanted us to know he was there, and they wanted HIM to know THEY were there.  I shooed away the hens and sent the coiled beastie on his way.  As he slithered as fast has his little scales would take him, he was further put in his place by chasing hens.  Hens who love the chase, but who are equally distracted by the first flying/jumping insect.  Mmmm I'm going to get that snake, snake, snake! Oh look a grasshopper!

The next topic of our day, with no segue what-so-ever, is house projects.  There never seem to be a shortage of those.  We all saw on the news the story about the great earthquake in Oklahoma.  Yes, we felt it up here.  OH BOY did we feel it.  We didn't DO anything about it, but we sure felt it.  Doc was in the little boy's room, which is a tiny cubical.  He heard the creaking of the floorboards in the room behind him and assumed it was The Boy up and walking around the house.  THEN the house started to shake, and then the floor started to roll and the walls swayed. 

On my side of the house, I was sleeping like a brick.  But was listening to the chickens through the open window.  They were really noisy.  I mean really, really noisy.  I mean more than their normal chit chatty.  It was more like a Siberian tiger was stalking the run, and then it ...went ....dead.....silent.  Then I heard the rattle and the windows shook.  I said to myself, "Oh, earthquake." and then since no one was screaming in pain, and the roof and walls were still on the house, I went back to sleep for an hour. 

When I got up I surveyed for damage.  Yes, we had damage.  I swear I am the only person in the whole state of Nebraska with earthquake insurance.  It didn't do enough damage to even make me want to put in a claim.  But I did let them know about it in case it causes a larger problem further down the road. The rolling of the earth caused stress fractures in the concrete floor on the ground level of the house and a pop fracture in the barn concrete floor.  Also the stress fracture in the basement has a corresponding  space in the upstairs hardwood floor joint.  Nothing more than only I would notice.  But they are there.  The few nail pops in the ceiling and a couple walls that I meant to fix in the Spring, are a little more noticeable, but not horrible.  There is also a crack in the floor grout in the master bathroom for the entire 12 foot length of the bathroom.  All the cracks are new and parallel to each other.  Cool, but it is what it is....... So I'll watch the basement for water seeping and patch the pops.

My major project (besides the coop addition) was painting the front door.  As you may recall I just painted, but, although pretty, it just wasn't quite right.  It was supposed to be the bright royal blue of the field of an American flag.  But it really was far too far towards the purple, and that's all I really saw. 
Old door, Homecoming Blue, but too purple!
The more I looked at it, the more it bothered me.  I had to fix it.  The local state park has a sign out front of one of the entrances that I really liked painted a fabulous deep teal color, Behrs Tropical Skies. I really like it, but a sample board placed by the front door wasn't quite singing to me. 

So another trip to the hardware store yielded me a fistful of sample cards which were taped to the door and looked at in the morning and evening light.  Anything that didn't pass muster at either time was pulled.  In the end, I chose Valspars  Turkish Tile  It's a bright duckwing teal and is marvelous!  I had the hardware store tint the primer a dark grey, which made the deep teal paint a more true color.  Two coats of blue paint later, and the door was done.  This time for good!


With the door shining in the evening sun the front porch announced that it was missing a white rocking chair.  A quick stop at Cracker Barrel on the way home from work solved that problem.

With the clean new door, and bright contrasting rocking chair, the old, rusty, cracked doorbell button and surround bugged me.  Silly the things that get to you.  I didn't want another standard button and started searching the hardware store.  At the big orange box store I found a lovely round button in the same brushed nickel as the door hardware. Perfect, until I got home.  I thought the holes for these things were standard.  Wrong.  Since I was dealing with drilled and anchored brick, resetting the holes wasn't an option. (Well I COULD, but that would require at least three long walks to the barn for tools.)

I started thinking about other things I could use as a doorbell button surround.  (It turns out the wired button just pops out of the decorative surround.) My imagination started wandering to things with holes about the right size, or of things I could put the right size hole in.  I wanted cool.  I wanted different.  I wanted original!

Could I drill an antique cup and saucer and glue them together?  Could Doc make me something cool out of wood?  Is there a piece of horse tack I could use?  Could a make a fake nest with ceramic eggs in it and mount the button in the eggs and mount it sideways to the wall?  Everywhere I went I was looking at things to mount or drill.  And then it happened.

On a strop to the Liberty House Antique store to say goodbye to my good friend Pat (who turns out ISN"T moving after all -long story) I found something I JUST COULDN"T put down and leave behind.  Trust me I tried.  The more I thought of it, the more my brain latched on to it.  I just had to try!  I found a galvanized fair ribbon.

I looked it over and it was lightly welded together, so it looked like I could take it apart to paint it.  The center looked like I could take it off and drill it, or if drilling failed, I could replace it with another disk that was for the button.  For $8, it was worth a try.  I stopped at the hardware store and purchased red paint.  Yes, a blue ribbon would be cool, but it would look terrible with the teal door, and look like I was trying to be matchy.  What I wanted was BOLD!  So I went with Gloss Candy Apple Red.

I took the whole thing apart and sprayed away.  The center disk I removed and replaced with two large washers, which were the perfect size for the button and the base.  I drilled the ribbon and mounted it to the existing holes.  It's PERFECTLY ADORABLE!  Everyone LOVES it!  I hope you do too.

With that the only looming project is that coop extension.  We are loosely planning on a barn/stable and fencing in the pasture, but that would be a contracted company job.  I just have to point and serve brownies.  That's if I ever get my nerve up to say "yes" to the whole thing.

I'm such a chicken.

Sunday, July 31, 2016

I've got Pokemon Go! beat!

All the world is buzzing with the new smartphone game Pokémon Go! People wandering around trying to "capture" pre-stationed cartoon characters. It does get people outside and to knew undiscovered locations.  I honestly do not see the fun in it. But I can see the value in the hunt.  But I've got the game beat!

Since we've had a week of only low 90s the past week at the station, we decided to get some of the outside work done while we could still function outside.  (We'll be well over 100 humid degrees again this week.) One of our projects, well MY projects, is lifting the height of the septic tank clean out stacks for both the house and the barn.  When we moved in, just the top 2 inches of the domed caps were visible.  I thought nothing of it, as they were white and easy to spot in the crummy "lawn".  That spring, as the grass I so carefully babied the autumn before and pre-fertilized in spring began to grow, and grow and grow.  Still I could spot the caps when I mowed.  In fact, our OLD mower would sometimes chink the tops and they would be easily spotted.  I distinctly remember thinking to my self that I should glue quarters to the tops of those caps so IF they ever disappeared, I could locate them with our metal detectors.  At that point, I must have been distracted by a puffy cloud or a butterfly or something, because I never DID glue those quarters to the tops.

Fast forward a year.  and TWENTY cubic yards of new dirt and naturally composting lawn and thatch, and my caps are missing.  I knew the general location of one.  It was near the old, old chicken run. Some grid walking and foot swooshing later, I managed to catch a glimpse of a one inch patch of white PVC in the deep lawn.  I marked it with a lawn flag.  I KNEW the other one was between that find and the taller 2 foot cleanouts in the hayfield.  I KNEW where is was, or so I thought.  I was off by about 8 feet.  When found, it was marked with a flag. 

Now came the hard part.  There are two more in the real back lawn. I LAST saw them right after the debacle with the crummy landscaper we had.  He constantly ran over them with the bobcat.  When he scrapped the topsoil, what was left of it, away he covered my clean outs with grass seed and then that idiotic hay netting.  When his attempt to grow grass on compacted clay failed, I added a couple inches of composted black topsoil and seed.  I worked around the caps, on purpose.  They remained visible, for a while.  Each week the lawn grew up and out, it's thickness increasing.  Each time I would mow I would see less and less of each of the caps.  Until one day, I not only didn't see them, I didn't even notice they were missing and went on with the day. 

We had a general idea of where they were, but that a LOT of guessing for a 4 inch circle in 2000 sq ft.  YOU'D THINK they'd be in a straight line, but aren't. 

We started by just walking the yard poking the lawn with rebar. That didn't work. 

Then we figured where the line came out of the house and drew a straight line to the known line further out in the hayfield.  THAT didn't work.

We then searched through photos of the yard we took while playing with the chickens or detailing the bad landscaping job.  THAT didn't work.


We sought the help of the internet at this point.  We loaded Google Earth time machine and went back to an aerial shot of the property right after the house was built.  While we didn't locate the caps with this method, we did figure out we were about 3 feet too far north in our search. But then....BINGO, Doc found one of the caps by the driveway about 6 feet from where we KNEW it to be. 

There is still ONE missing.  Sigh. 

We took angle and distance measurements from Google Earth.  We paced it out.  We dragged out the cell phone compass app.  We played with the 100 foot long tape measure. No luck. SIGH.

It was becoming an after dinner obsession.  As the temperature would drop near sunset, we could be seen pacing the yard, putting out guessing flags, poking, raking thatch, swapping theories, then the sun would set and we'd be forced to stop for the night.  The hidden PVC cap mocking us in the cool evening protected by its veil of darkness and mosquito army.

Yea, it was getting personal.

Thursday evening we had cloud cover and a cooler breeze, which made it a PERFECT candidate to wash the windows on the barn and house.  It was during this 72 window marathon that I discovered ANOTHER cleanout vent hidden beneath a window, buried in landscaping stones and covered with landscaping fabric.  This confired the Google Earth assessment of the line being 3 feet further south than we had been looking.

Renewed by this exciting find, we went high tech after the sun went down.  We used our laser printer on the newest cap and aligned it with the nearest the driveway. The missing cap HAD to be in a line bewtween the two.  As we tipped the laser pointer across the lawn, through the mass of flags guessing at a location, the beam hit one flag square on.  Could it BE THAT EASY?!

Of course not.  We still haven't found it.  It has to be there.  As the rains came, the new seed and soil gently covered the plastic lid enough to grow over.  I will lightly hose this area to see if I can spot some white.  Otherwise it will remain hidden.

All for the want of time, a little glue, and 4 quarters.  Forget Pokenmon Go!

IN OTHER NEWS

Chicken jail has been busy.  Merriweather has come and gone.  Daisy spent three days in the lock-up.  Flora decided to be her companion and is still in.  She's a tough, mean, hyper broody.  She squawks, bites, and climbs the walls.  She also tries to escape at every opportunity.

With the weather cooperating, I decided to add the two additional nest boxes to the coop.  For the original nest boxes, I used Threshhold brand cubbies from Target.  I simply needed to add perches, a stop back and a piece of ply for the back.  I used a two by three cubby. Sadly they do not make a stack of one by three, just one by two.  That would be enough to add to the current next wall.  I put the cubbies together and decided that insead of centering the two on top of the 6, I would slide it over and have an open air nest area on the very end.  For the nest space, I simply purchased a large desk basket from Hobby Lobby for $8 and attached it to the cubby below it with screws and washers.  The girls LOVE IT!


The garden is starting to awaken.
The peppers are a total bust and I'll pull them at the end of the week. 
Today I will braid the white onions that have been harvested and drying for the past few days.
The yellow and sweet onions still have another week, at least, until harvest.
I harvested the potato plants last night.  6 plants, 6 potatoes the size of golfballs.  ARGH.
The grapes are going wild. 
The tomatoes are starting to set fruit, but the plants are suffering in our heat. I'm not holding my breath for a great harvest.
The nitrogen setting peas have been planted in the old onion and potato beds.
The cucumbers have decided to take over the world.  We've had plenty and by the looks of the vines, we'll have more than plenty. I made 9 quarts of dill slices and spears yesterday and today.

That said...

The county fair is next week.  I have garlic-onion-dill pickles, applesauce, dark sweet dessert cherries, jalapeno sweet relish, and jalapeno grilling marinade to enter.

We shall see.

From here on the Farm... Have a great week all !


Thursday, July 28, 2016

Badgers? We don't need no stinking badgers! (But we do need to contain screws and nails)

During Caryl's recent unplanned lawn-mowing,1 she discovered a fresh burrow in the ditch.  A quick visit to Google to compare burrow features tells us it was most likely dug by a badger.  We set up the game camera to observe the burrow and to confirm the identity of the owner (we'd have been perfectly happy to discover it was dug by a groundhog) for a few nights.  In the time the camera observed the hole, it captured only one video:  a fox investigating the hole for a few seconds.  On the last night we went so far as to leave some food just outside the burrow, and still nothing.  Our conclusion is that a badger dug the hole to get to a ground squirrel or some other prey, and it hasn't set up residence.  So I moved the dirt back into the hole, and so far nothing has dug back out.  So that's that.


Meanwhile, I decided to try to contain the various screws and nails we have in the barn.  They have a proper "home:"
But owing to the necessity of reaching that ledge over the workbench to put them away, they often end up like this:
So Caryl came across a storage unit that consists of jars attached to an octagonal cylinder (I subsequently found some that use a hexagonal cylinder or even a simple 4x4).
If you look closely, the sides of the cylinder appear to be from wood
stock that's thinner than a standard 1x4. Not relevant, just interesting.
Rather than duplicating that storage unit, I decided to be inspired by it.  As with the original, mine is octagonal, but I used 2x4s instead of the thin stuff used in the original, or even 1x4s. Yes, it made it heavier, but I figured all those jars of steel nails & screws would contribute more to the weight than the wood would (I briefly considered the possibility that I might not have been right), and I wanted to give the screws that held the jar lids to the boards something to really grab on to.

So, an octagon. Each corner of an octagon is 45°, so I needed to rip the sides of the 2x4s to make 22.5° angles. I traced a 45° angle from a square onto a scrap piece of 2x4, and then I bisected the angle. (Back in high school drafting class I learned how to bisect a line
segment with a perpendicular line. To bisect the angle, I drew an arc across the angle and then bisected the arc using the same technique to bisect a line segment.) I cut the scrap 2x4 along the bisecting line, and used the resulting 22.5° angle to set the table angle on the Shopsmith. I then ripped 2x4s that'll be the sides of the cylinder so they had beveled edges.  I decided to attach the sides together using a tongue-and-groove joint. The dado blade made quick work of this. (My dad later suggested a spline joint might've been easier. Something to consider if you decide to do this yourself.)

I glued together pairs of those 2x4s, and then two of those pairs made a half of the cylinder, and then two halves glued together made the cylinder.  I clamped it all together with a couple of straps and let it set overnight.

You'll notice that the original had the cylinder sides circumscribing the end caps; I decided to have the end caps fully cover the ends.  So I traced each end of the cylinder onto a 1x10 (yes, one of those 1x10s) to make the end caps,  I marked both the cylinder and the end caps so I knew which edge of each cap's octagon corresponded to which face of the cylinder, which cap went with which end of the cylinder, and which face of each in was inward facing and which was outward facing.  All this was to account for any imperfections that made the cylinder less than a regular octagon (which are unnoticeable on their own but stand out when the end caps are misaligned).

I could have simply screwed the end caps into the sides' end grain (and you'll notice in the original, the sides were screwed into the end caps' end & edge grain), but I decided to try a new (to me) technique.  Pocket joinery.  Someone described a pocket joint as an "engineered toe nail," and I'd say that's a fair description (though I wonder if "toe screw" might be more apt).  It involves drilling a pilot hole for a screw's shaft at an angle from the face to the end of the wood and also a larger diameter hole coaxial with the pilot hole that serves as a countersink for the screw's head.  You can buy a drill bit that does both holes at the same time and a jig to control the motion of a hand-drill.  As for me, I angled the Shopsmith's table, affixed the drill bit chuck, and used it as a horizontal borer, first with the pilot holes and then with the countersink holes.  I've decided that if I do more pocket joinery then I'm at least going to invest in that drill bit.

A couple of steps before painting.  I found the centers of each end cap and drilled holes for the axle with a Forstner bit.  Since my original alignment marks would be covered by the paint, I made some blue paint splotches on the ends of the cylinder and on the inside face of each end cap, let them dry, and then masked them with painter's tape.  Now I painted the whole thing red (with the end caps off) and let it set overnight.  When I removed the painter's tape, I had my alignment marks.

The axle is a portion of an old closet rod.  Using the Shopsmith's belt sander, I made the ends a little thinner than they originally were, so they slipped through the holes I drilled in the end caps.  Just a little further inward, I drilled pilot holes and drove in a couple of nails to act as stops so the cylinder couldn't slide up & down the axle by more than about an eighth of an inch.

Now, there are two reasons I used an old closet rod for the axle.  The foremost reason is because it was available.  The other reason is because rather than being a tabletop design like the original, my storage unit will be attached to the wall and supported by a couple of closet rod brackets that we had laying around (hand, meet glove).  To keep the axle from sliding up and down on the brackets, I needed stops on the ends.  The nail solution from the previous paragraph wouldn't work because the nails might catch on the brackets and not allow rotation.  So instead I used a hole saw to make a couple of discs and drilled a hole for the axle into each.

For the jars, I used 1-pint canning jars (the extras to be used for food canning).  I pre-punched holes in the lids and drove screws through the lids into the cylinder, using washers for a little extra purchase on the lids.  I hung it up, and it works like a charm.

And, yes, the screws add considerably more to the weight than the wood does, even after filling only a few jars.


1unplanned lawn-mowing: She was only going to mow around the Oodelally Egghouse until she ran out of gas.  I drove to the general store and returned with full jerry cans, so she never ran out of gas.