WARNING!!
All content on this website is copyrighted. Do not use any content of this website without our written permission, to include photos.


Thursday, January 7, 2021

A Gnother Gnome

Doc here.

During the winter break, I decided to create 3D wall art of Baard the Gnome.


I started by printing the line-art that Caryl had created for her Etsy shop to create graphite rubbings for the general outline. The body is formed by halving a length of 1x12 and using a thickness planer to reduce the two halves down to about ¼". While it would've been nice to make the resaw cut in a single pass on the bandsaw, the wood's width was too great -- so I made two passes on the table saw.


Several passes through the thickness planer brought the pieces down to ¼" thick.


I then made the graphite rubbings on each of the two pieces and cut out the layers of Baard's body using the bandsaw.


When I rubbed the outlines onto the layers, I also marked three points by punching the pencil through through the paper to mark holes to drill on the drill press.


Two of the holes are drilled all the way through the back layer and partway into the front layer for dowels to align the two layers. The third hole is drilled all the way through both layers to position Baard's nose.


Then I used the strip sander to make the final touch-ups to the layers' outlines and to partially round the edges.


On to Baard's hat. At first approximation, it's a triangle, but the sides are slightly curved, and the bottom edge has a pronounced curve. The front of the hat is a curved surface. I wanted the lower corners to be at the same level as the body's front layer and the middle of the base to project about a half-inch from the front layer, which would be the full thickness of the original 1x12. The peak of the hat should be slightly shallower than the body's front layer.

I started with a graphite rubbing and then cut a triangle. The reason I started with straight sides instead of starting with the bandsaw was so I could make bevel cuts to start shaping the front surface. By running the triangle's sides along the tabletop, the resulting bevel faces will leave the base thicker in the middle than the sides, and the sides and peak will all be at the same level.


After using the bandsaw to introduce the slight curves on the hat's sides and the pronounced curve on the base, I used the belt sander to finish shaping the hat's front from a collection of flat facets to a single curved surface. Finally, I used some scraps from forming Baard's body to extend the thickness of the hat's sides so the hat appears to fully enclose Baard's head.


I cut out Baard's nose from the 1x12 and gave it an initial pass at rounding it with a ⅜" roundover bit on the router table. I further rounded it with the strip sander.


The strip sander left Baard's nose faceted, and so I finished rounding it using a sanding sponge.


Baard's shoes were daunting at first glance.


I decided to start with a scrap of 2x3 and used Forstner bits to cut the concave curves first. I cut a dado down the middle of the 2x3 and then cut the 2x3 down the middle of the dado, creating the two shoes -- each half of the dado is now a rabbet to attach the shoe to Baard's body.


I used the bandsaw to cut the convex surface at at the bottoms of the shoes, and then I free-handed a rough oval shape from top to front to bottom to back. I touched-up the shaping on the strip sander and, as with the nose, removed the faceting with a sanding sponge.


I added a little detail using rasps, and I cut the excess dowel material off the back using a bear saw.


The two body layers, and the hat now pressure fit together, and the body and feet stay together using gravity if the body were to be propped up.


After I finish-sanded it, Caryl stained the segments and glued Baard together.


Monday, December 21, 2020

Mini Schnitz Hand Pies


 Hand Pies.  Tiny fist sized capsules of dough (fried or baked) that are used to contain and transport fabulous fillings into your gullet.

As long as I had the induction coil plate out for the Rosettes the other day, I decided to go ahead and deal with the dried apples that had been so unceremoniously displaced from the cookie jar.  The cookie jar spent all of Fall housing a gallon of dried apple slices from the Fall harvest.  As the season switched from the crisp autumn air to full on frigid, I noticed the apples were being nibbled on less and less as a snack.  The jar now holds oatmeal pecan toffee cookies, and the apples were thrown into a large ziploc baggie on the counter.

I had plans to just make two, full-sized, Schnitz pies, one for us and one for the neighbors.  But the more I thought of it, the more I started to lean towards making smaller hand pies. A pie is cut into 6 or 8 pieces and then gone.  I can get far more hand pies than 12 or 16 if I make them hand sized, or better yet, bite sized, which means more gifts.  

Hand pies are prevalent in many cultures, they have many names, and can be filled with either sweet or savory fillings and can either be made with a doughy, biscuit like crust, or a flaky, pie dough like crust.

Schnitz pie, is an apple pie made from re-hydrated, dried apple slices.  I sometimes add raisins.  The hens have eaten all the raisins I had in the house this time, so these are just plain apple.

The recipe is simple and non-exact for the filling.

Place about 2 cups of dried apples slices in a pot and cover with water.  They'll float, so push them under.  Cover the pot and simmer as low as you can for about 30-40 minutes.  You can also use apple juice, or a combination of apple juice and water.

Drain the apples.  I simply pour the now re-hydrated apples into my small mixing bowl with the flat beat attachment, or even the smaller whisk attachment. 


I then add:

2 teaspoons of cinnamon

2 Tablespoons of brown sugar

dash of salt

dash of of Nordic Spice (optional)

I gently work the apples and spices until they are almost a paste, but still have texture.


For the dough you can use store bought biscuit or pie dough or you can use your own favorite recipe. The trick it to make it thin so it cooks through in the hot oil.


You can cut large circles and then place filling in the center and fold the dough into a half moon shape, or you can cut two circles, placing one on top of the other - like making ravioli - sealing the edged with a little milk wash and a fork on either shape.  I used a biscuit cutter and my ravioli cutter to shape, and seal in one blow.


You then fry at 370 degrees until golden brown, flipping them over when needed,  and then remove and allow to drain.


Dust with powdered sugar if you like.


Friday, December 18, 2020

Farmer's Cheese

 Well it turns out that I haven't posted here about making Farmer's cheese.  I can't believe it, but it's true. I only mentioned it here.  The next time I make it, I'll add photos to this.


Farmer's cheese is just about the easiest cheese you can make at home.  You don't need special equipment.  You don't need rennet or junket.  


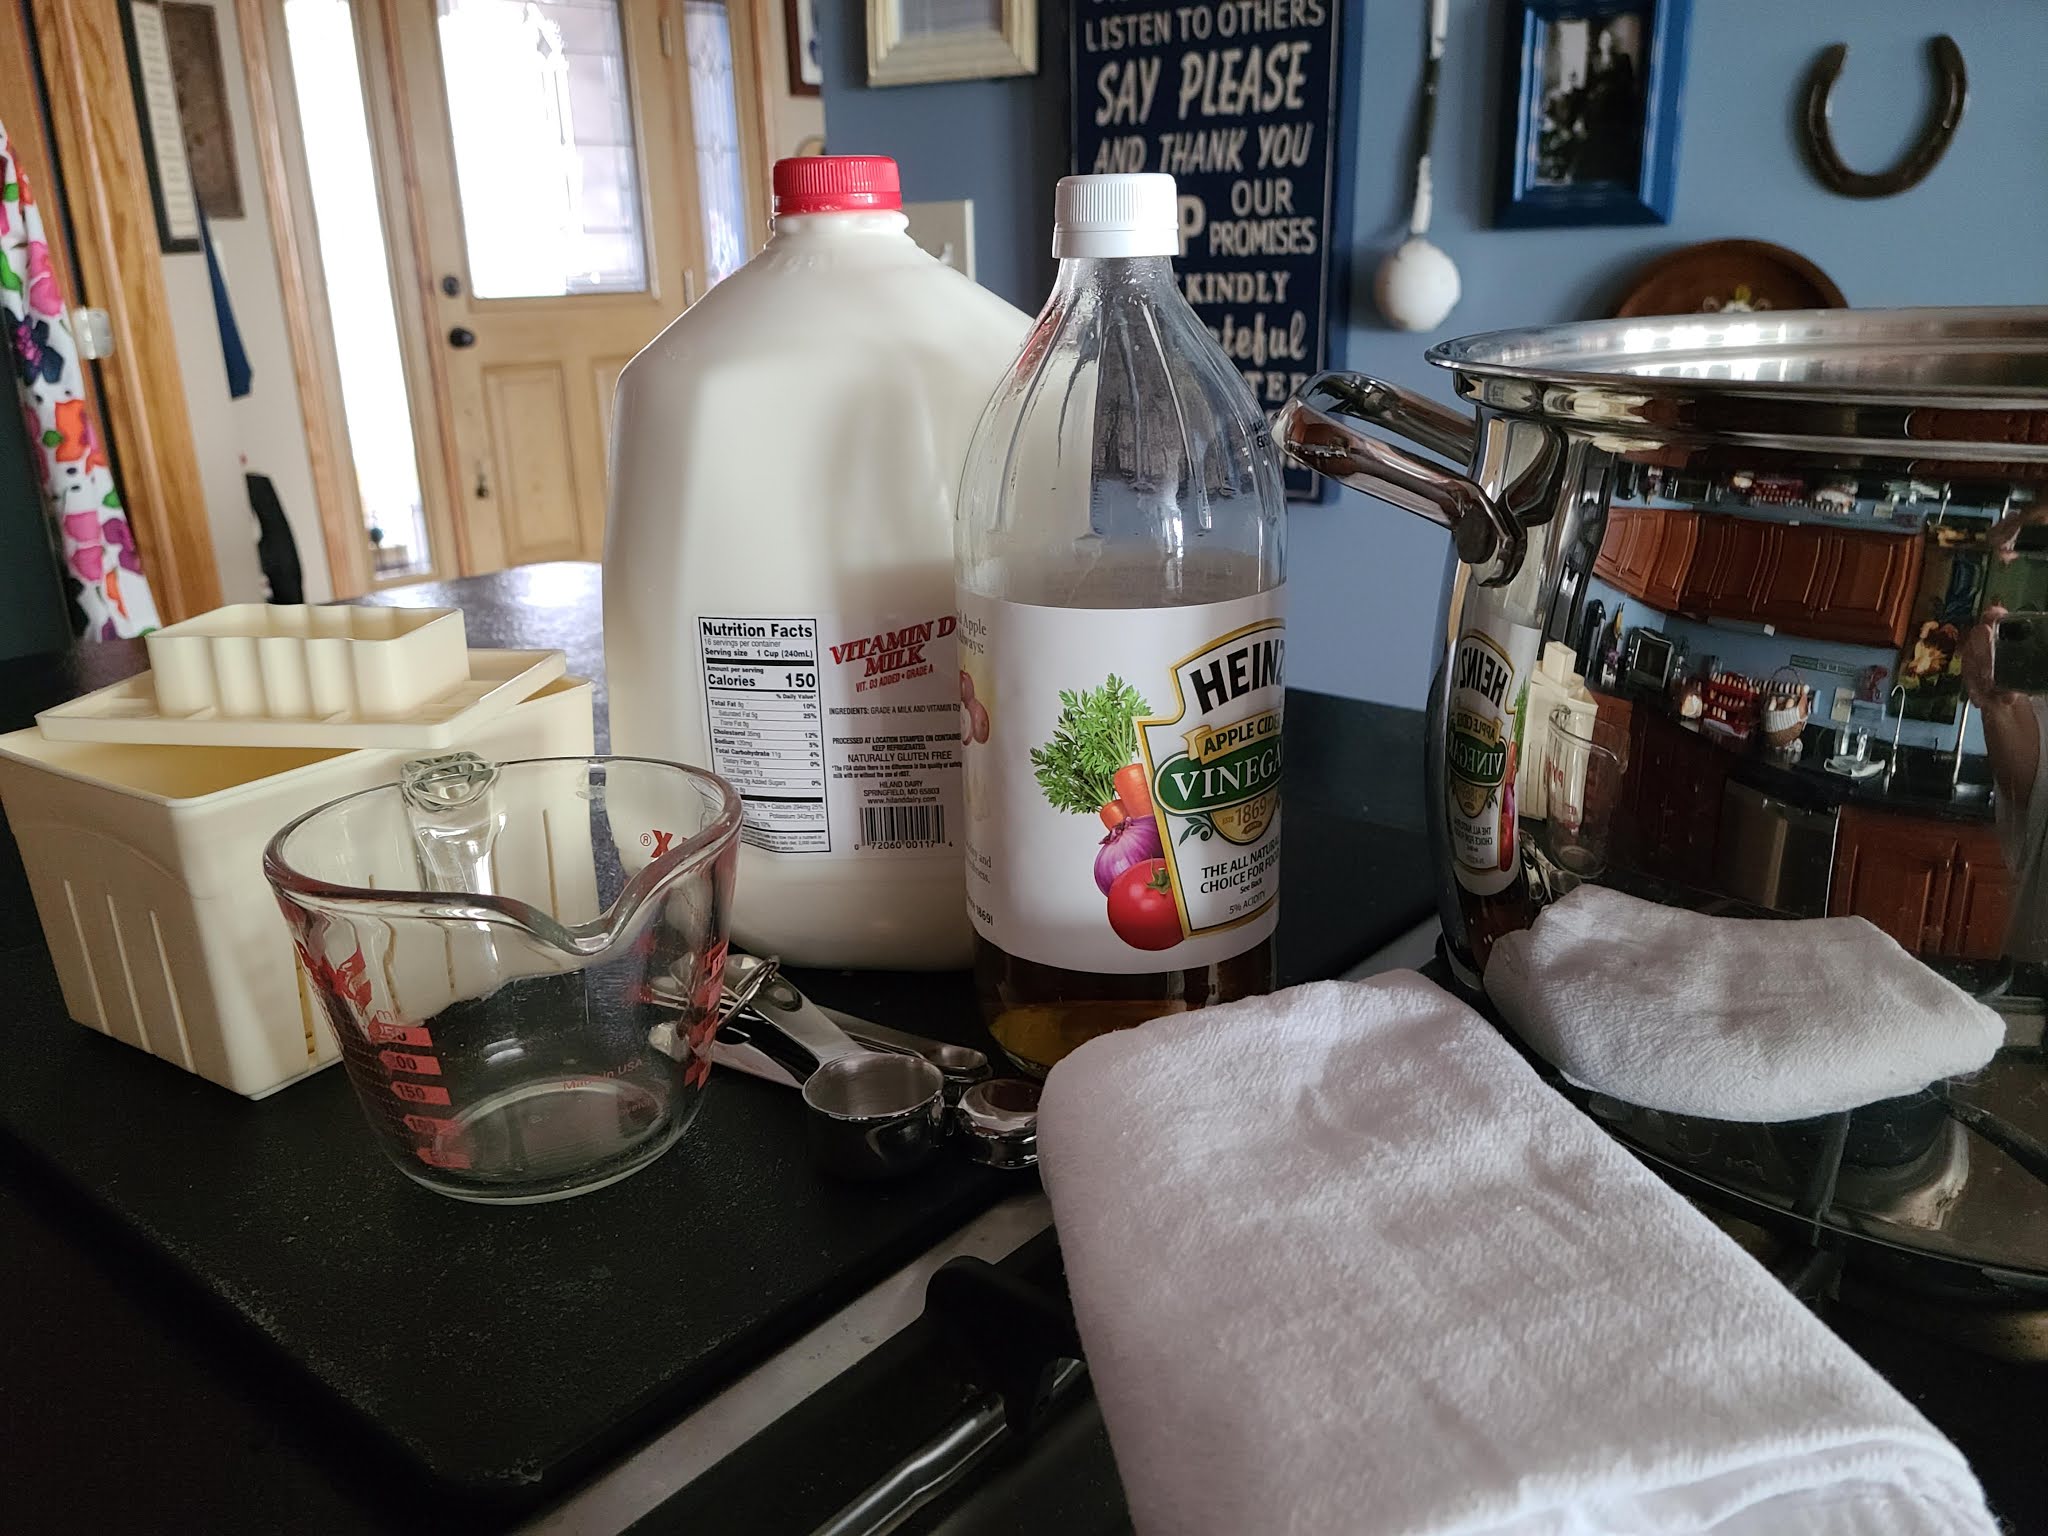
You simply need a large heavy pot, like enameled cast iron or thick bottomed stainless steel.

Depending on how much cheese you want to make will depend on how large a pot and how much milk you will need.  

To give you an idea, I usually just use a gallon of good quality WHOLE milk and then use my 8qt stainless steel double bottom spaghetti sauce pot. From that I get 1 pound and 6ish ounces of cheese curds.

You can easily adjust this to a half a gallon of milk.


So what is Farmer's cheese?  It lies somewhere between the world of Ricotta and Cottage cheese. It is just the curds from heavy milk, that are drained, pressed, salted, and if you want to go nuts, seasoned.

NOW what do you do with it?

I use it like ricotta and mix it with egg and seasoning to fill stuffed shells or sprinkle in lasagna or on top of pizza, or in quiche or on salads.


BUT more likely than not, it is salted, seasoned, and pressed into an inexpensive cheese mold and then served as a high protein snack with crackers.  

I use the collected whey from the process for my liquid in bread making.  It's a sneaky way to add protein to your bread.

You simply pour your milk (DO NOT use high filtered milk like Fairlife) into your pot and set the burner to medium and get it warming up. The fattier your milk, the more curds you will get.  This is where I will toss any cream in the fridge that is close it it's date as well.  

I DO NOT SALT MY MILK. Save the salt for the end. 

 You don't want to get it to a boil, you're looking for just below a simmer.  It will start to get bubbly and foamy on the top.


Stir it on occasion while you are setting up the draining area:

I cut about 3 feet of kitchen cotton string and have it handy too.  You will gather the ends of the towel later and hang it from a cabinet knob to drain.

Mixing bowl for salting and seasoning.

I put a 6 qt bowl in the sink and place a colander on that.  Over the colander I lay a clean flour sack dish towel.

++++++++++++++++++++++++

OK back to the almost simmering milk. Turn off your heat and give it a good stir.

ADD for each half gallon of milk a 1/4 of a cup of acid. That's right, just dump it in and stir it for a few seconds. The division of curds and whey should be almost instantaneous.


( They whey should almost look like weird lemonade.  You can add a little more acid if you think it still looks too milky.) Then STOP and put the spoon down.

ACID?!?!?!?  yes, but you've got it already, I promise.  You can use vinegar or lemon juice.  Some people use all lemon juice and some all vinegar.  I prefer a 50/50 mix as the citric acid stays in the whey and helps my yeast rise in my breads.  (remember you save the whey)

Let it just sit there for 20 whole minutes, no heat, no stirring.

When your time is up, pour your curds and whey slowly onto the dish towel that is lining the colander, over the bowl.


Gather up all the sides of the towel and tie and hang from a knob on your cabinets to drain for a few minutes. Either over the sink or a spare bowl.

Resist the urge to squeeze your cheese.


The more whey you remove the drier your cheese.  Good for some applications/final products not for others.  

When it feels like a blob of dough in a sack, pour your curds into a bowl and add salt, go easy to start, like 1/4 teaspoon and mix well.  Taste.  Need more? add more.


I also add garlic powder, onion powder and fresh cracked pepper and paprika.  Go crazy. Release your inner mad scientist.  (dill is good too, basil, oregano, sure! Why not?!) Even cinnamon and sugar with pecans is amazing!


Now put your mixed curds into a press and un-mold later, or if you don't have a mold, simply put back into the dish towel and roll and twist and squeeze it into a ball and turn out on to a plate.


Store wrapped or covered with plastic wrap or in a sealed container.  Use in less than 7 days.  We have frozen it for crumbling use later, but not for spreading or slicing.


Ostakaka

 Sounds weird, right?

Like a crazy joke from a 5 year old, 'what's for dessert mom?  KAKA?'


But seriously, it literally translates as cheesecake.  But this isn't your instant Jell-O brand sour pudding cheesecake, nor is it the dense, sugary, mile-high, graham cracker crusted dessert of New York City or Chicago.  It is not so much an acquired taste, as it has to deal with texture.  It is not smooth and creamy like American cheesecakes.  Think of it as custard and cheesecake having a baby.

This is the Scandinavian version of cheesecake, usually saved for Advent/Christmas, or other special events.  In American recipes, people have taken to substituting cottage cheese.  While I have never done that, even in a pinch, I suppose it would work.  The curds of American cottage cheese, it would seem to me to contribute the the chunky texture that puts off so many people.  

So what do I do?

I make my own cheese base.  The recipe itself is very simple, both for the cheese and for the ostakaka (Cheese-cake)

I use the same recipe for the farmer's cheese that I have previously posted and don't forget to save that whey for other projects!


For the Ostakaka you will need 16 ounces of curds from your 1 gallon of whole milk cheese recipe.  DO NOT ADD ANY salt.  Also do not drain it as long as you normally would.  You can leave it a little more wet than normal.  

****If you have extra curds from your gallon of milk, then put it aside for a snack while your casserole dish is in the oven.

Pre-heat your oven to 350 degrees and find yourself a 2qt casserole dish.

Add your cooled curds to your mixing bowl with the flat beater attachment or normal beaters and add the following:

3 eggs

Mix until the curds are fine and the eggs are well incorporated

Add:

1/2 cup white sugar

1 1/2 Tablespoons of flour

1/2 teaspoon of salt

1 Tablespoon of vanilla extract

1 teaspoon of almond extract

(Optional, but I like mine with 1/2 t cinnamon, a dash of ginger, sprinkle of cardamom, and maybe nutmeg)

Mix well at slower speed.

Slowly add in 2 cups of Half-and-half.

Continue to mix until the batter resembles loose cake batter with tiny bits of cheese curd in it.

Pour this into your dish and bake 1-1 hour 15 minutes until it looses its wet, jiggly properties and is very lightly browned.


You can serve this warm or cold.  (I prefer mine cold)

And it is traditional to serve it with lingonberries, lingonberry jam, or lingonberry syrup.


The slight sweetness of the Ostakaka helps tame the tartness of the berries.  If you really don't want to deal with the tart, then you can substitute with strawberries, raspberries or anything else you like.  

Enjoy.


***I've had a lot of questions about where I obtain Lingonberry products.  Of course you can find it on Amazon (no affiliation or kickbacks) or Scandinavian store, but the oddest place I have found it reliably, is Tuesday Morning!  So if you have one nearby still, check them out.

Wednesday, December 16, 2020

Rosettes


I love the holiday baking season.  The aroma of sugar and butter and spices all working together to drive the household insane.  I used to make so many kinds of cookies and make trays of goodies, tins of goodies, masses of goodies.

This year there are no holiday parties, no endless parade of office gatherings, club meetings, or cookie exchanges.  This year I am making a batch of cookies, and keeping a couple for us, and giving the rest away to a neighbor.  Another batch of something else, and another neighbor gets a plate of deliciousness.

It has eliminated the baking marathons, which is actually kind of nice, and has eliminated the need to keep mass varieties of cookies fresh.

Is it my preferred method, no. I miss the arranged, colorful treats, of all shapes and sizes on one massive tray, covered lovingly with shrink wrapping. 

But as with so many things this year, it will do.  And my neighbors, especially those that don't cook, or bake, much beyond chocolate chip cookies from a tube, appreciate the good eats.  Even those that are also old country cooks, appreciate something that is NOT from our own kitchens.

This past week I made Rosettes.  

I'm not a fan of frying things in the house.  When we lived in the deep South, I would drag the electric skillet outside and stink up the great outdoors with the funk of fries or aroma of beignets.

It was 5 degrees this morning when I got up.  (F not C)

So inside it is.

This is the recipe I use:  I make sure it is fairly thin, almost the consistency of crepe batter or very heavy cream.  I also add in some cinnamon, some nordic spice, a little ginger and some cardamom.

Recipe

New irons can be purchased all over the world wide wonderweb and you can even find them quite inexpensively in thrift stores and in antique stores.

Mine is from the 30s, and is actually cast iron.  Somewhere along the way, the seasoning on it was lost, and I forgot to re-season it.  So it took about 6 Rosettes to get the polymer good and slick again with oil.


Someday, I'd like to find a solid set that also makes little round, star, square, or swirled nests for tarts and fruits. Someday.  

I cover my counter with flour sack towels for any oil splatters, and I use my induction cooker to keep the oil at temperature.

Heat your iron in your hot oil.


A quick tap on a paper towel to remove excess hot oil.


A quick dip in the batter.


Straight back into the hot oil.


After a few seconds, when you lift your iron, the 
Rosette should just slide right off.  If it doesn't, you might
have to nudge it a little with a skewer until the iron
builds its non-stick superpowers. 


When the Rosette is golden, remove it with a spider or 
slotted spoon to a rack where it can drip any excess oil.
Sprinkle with your topping.

It is important when you make rosettes that you have a little patience with yourself.  The first few never seem to come out right, or even come off well.  That's ok.  Sometimes it means your iron or oil isn't hot enough.  Sometimes your iron just needs to season a little more.  So if you go into it knowing that it's kind of like pancakes, where the first couple are just duds, then you'll do fine.

It is also important to let that oil come back up to temperature between rosettes, and keep the iron hot.  After I slip it off the iron, I actually just leave the iron in the oil when they finish cooking, and while I move them to the drip and cooling rack.  You very quickly get t a rhythm going.

You can sprinkle them with powdered sugar, cinnamon sugar, dip them in chocolate glazing, pretty much let your mind go crazy.

I store my extra ones in the freezer and either eat them cold, or put them in the oven to crisp them back up.


Tuesday, December 15, 2020

Shop Small, Shop Local


Open Holiday Market Day in Raymond, Nebraska


As the days grow shorter, and the nights grow longer, we slide closer and closer to Winter Solstice and Christmas.  This year more than ever shopping local businesses and small businesses has become critical.


As large corporate giants continue to fill a need, small businesses were already on the decline, now they are endangered. 

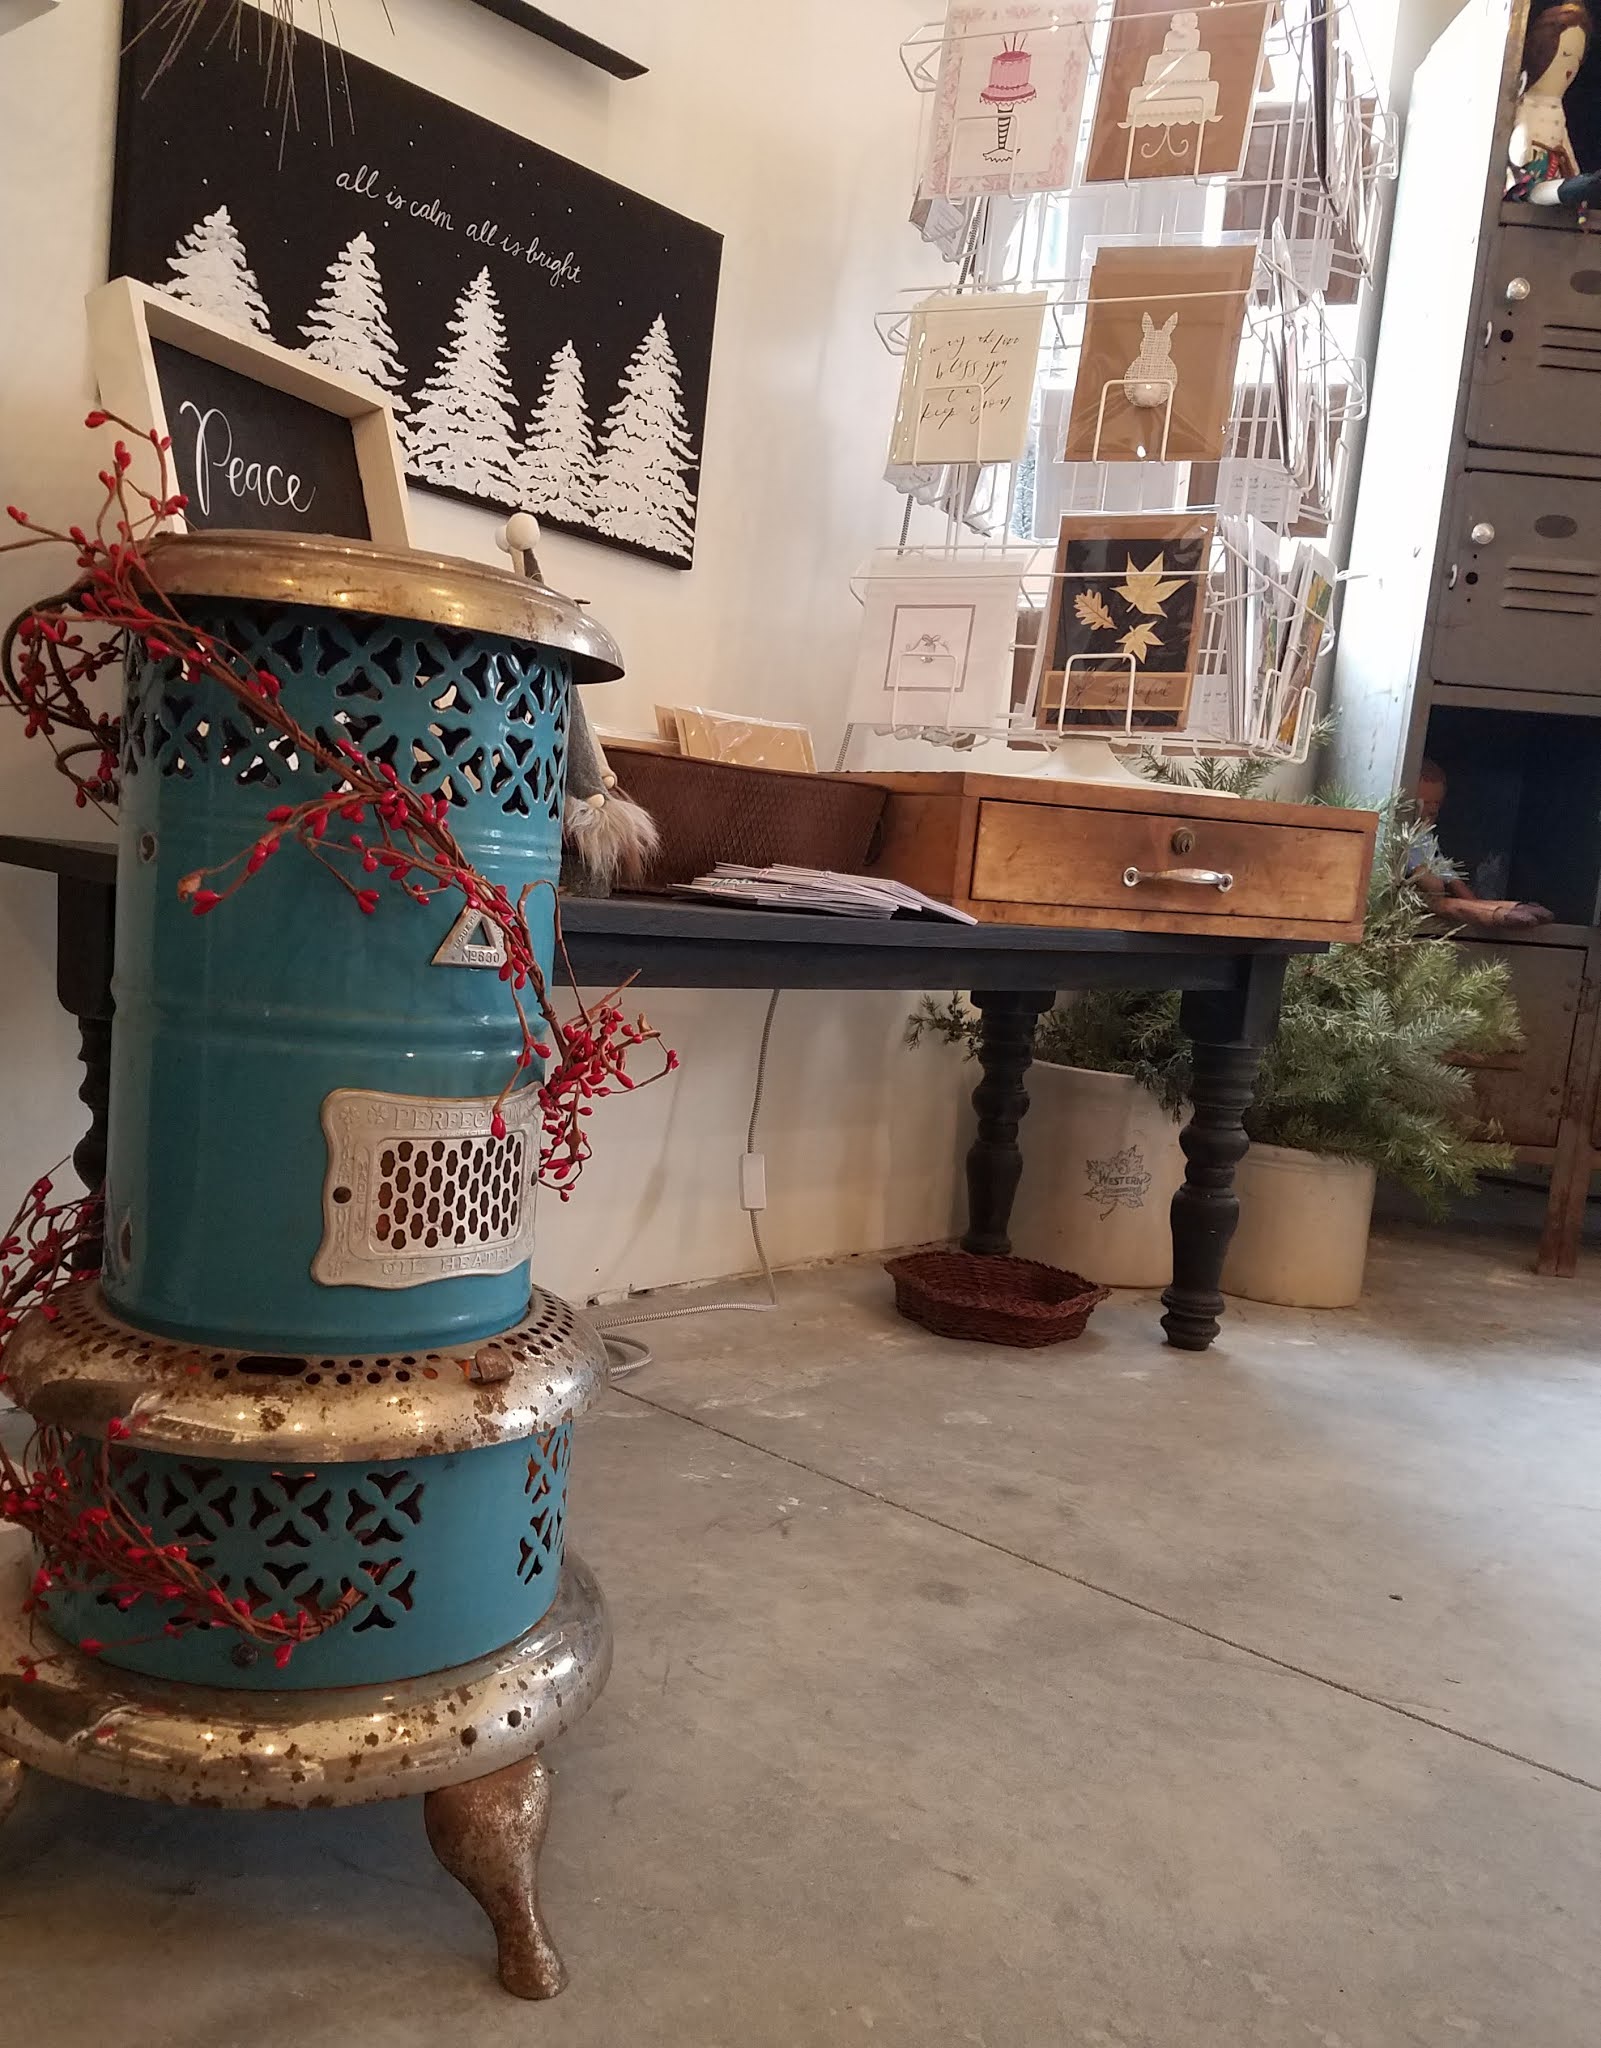
I converted this adorable
kerosene heater to a flickering
flame, electric floor lamp.


I've been lucky enough over the past few years to have joined in the Etsy community, where my items are shipped all over.  It's an amazing group of ridiculously talent people that would otherwise not be able to afford to ply their wares.  Etsy has given them a virtual store front and an audience of people who appreciate the hard work, dedication, and originality of craftsmen in a small scale operation.

Many of us are also lucky enough to partner with other small businesses in our own local areas for small shop days.  I partner with Rebecca at West Mill Flowers in Raymond, Nebraska who generously opens her shop to local artisans.  The increase in her shop inventory increases her foot traffic, which increases her own business and word of mouth.  

She makes the most GORGEOUS full wreaths in the floral 'off season'.  INCREDIBLE!


We all help each other.  As the time to actually ship things to family 

and friends becomes more and more difficult, seek out these small 

local treasures (observing local restrictions of course), and go on an adventure

and make your holiday small and personal again.


We all thank you from the bottom of our hearts.


I knit dozens of Norwegian Fjord and Fjell
wool blend cowls for Open Holiday Market.