Doc here.
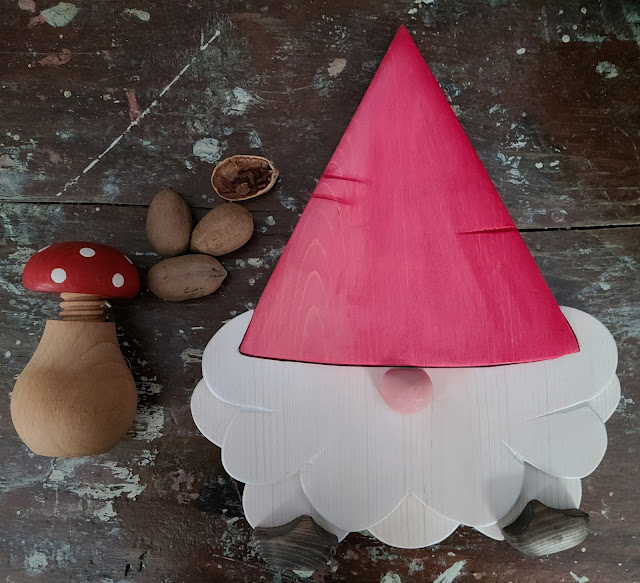
During the winter break, I decided to create 3D wall art of Baard the Gnome.
I started by printing the line-art that Caryl had created for her Etsy shop to create graphite rubbings for the general outline. The body is formed by halving a length of 1x12 and using a thickness planer to reduce the two halves down to about ¼". While it would've been nice to make the resaw cut in a single pass on the bandsaw, the wood's width was too great -- so I made two passes on the table saw.
I then made the graphite rubbings on each of the two pieces and cut out the layers of Baard's body using the bandsaw.
When I rubbed the outlines onto the layers, I also marked three points by punching the pencil through through the paper to mark holes to drill on the drill press.
Two of the holes are drilled all the way through the back layer and partway into the front layer for dowels to align the two layers. The third hole is drilled all the way through both layers to position Baard's nose.
Then I used the strip sander to make the final touch-ups to the layers' outlines and to partially round the edges.
On to Baard's hat. At first approximation, it's a triangle, but the sides are slightly curved, and the bottom edge has a pronounced curve. The front of the hat is a curved surface. I wanted the lower corners to be at the same level as the body's front layer and the middle of the base to project about a half-inch from the front layer, which would be the full thickness of the original 1x12. The peak of the hat should be slightly shallower than the body's front layer.
I started with a graphite rubbing and then cut a triangle. The reason I started with straight sides instead of starting with the bandsaw was so I could make bevel cuts to start shaping the front surface. By running the triangle's sides along the tabletop, the resulting bevel faces will leave the base thicker in the middle than the sides, and the sides and peak will all be at the same level.
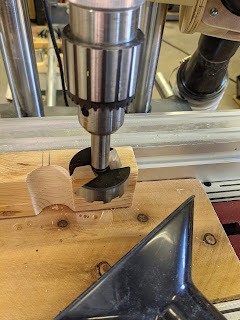
I decided to start with a scrap of 2x3 and used Forstner bits to cut the concave curves first. I cut a dado down the middle of the 2x3 and then cut the 2x3 down the middle of the dado, creating the two shoes -- each half of the dado is now a rabbet to attach the shoe to Baard's body.
I used the bandsaw to cut the convex surface at at the bottoms of the shoes, and then I free-handed a rough oval shape from top to front to bottom to back. I touched-up the shaping on the strip sander and, as with the nose, removed the faceting with a sanding sponge.
I added a little detail using rasps, and I cut the excess dowel material off the back using a bear saw.
The two body layers, and the hat now pressure fit together, and the body and feet stay together using gravity if the body were to be propped up.
After I finish-sanded it, Caryl stained the segments and glued Baard together.


